Removable Prosthodontics: Complete Dentures

Earlier, I made several posts about complete dentures and setting teeth. Since then, I've done a couple more and of course, with practice everything gets better.

1st Set-Up:

This was my very first set-up. Of course at the time I thought this was great
but looking back...yikes! You can clearly see that the left side is slightly higher
than the right, and the wax job is nothing to call home about.
Upper Arch
Looks a bit like it's leaning to the left an the 2nd molars are sticking out
too far bucally.
 Lower Arch:
Lots of faults: Right canine is making the distal turn, lingual gingiva on
the right too thin, left 1st premolar sticking too far bucally, etc etc

2nd Set -Up

Looks much better than the first, neater, more polished...
However, left posteriors sticking too far bucally.
 Upper Arch
Some areas needed wax re-enforcement.  2nd molars might have
been placed too far bucally.
 Lower Arch
Looks okay to me

 3rd Set-Up
Good, better, best right? In terms of occlusion, presentation, etc this one
turned out best.
 Complete dentures!
before festooning
 You can see here a little festooning and gingival anatomy

The Saga continues next semester. Stay tuned!

20 Questions with Dr. M. Rogers DDS (Ortho edition)

While perusing the Articles and Interviews section of the Student Doctor Network, I came across an interview with Orthodontist Dr. Michael Rogers who describes the field of Orthodontics and pinpoints the reasons he chose the field and why he thinks the field is  the best specialty.
Some points mentioned are note worthy if you are thinking of specializing in Orthodontocs.

The article/interview:

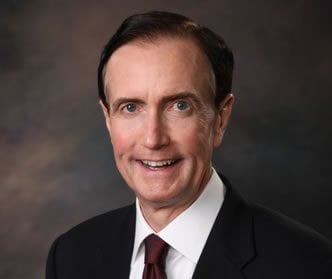
Dr. Michael B. Rogers owns a private orthodontics practice with his colleague Dr. Andrews in Augusta, Georgia. He graduated from Emory University School of Dentistry before serving as a Captain and general dentist in the U.S. Army Dental Corps. Later, he returned to the Medical College of Georgia to specialize in orthodontics, earning his Certificate in Orthodontics from the Georgia Health Sciences University (Medical College of Georgia) School of Dentistry.
Dr. Rogers is currently on the orthodontic faculty at the Georgia Health Sciences University and is a Diplomate of the American Board of Orthodontics. He has received numerous professional recognitions, including those from Georgia Association of Orthodontists (Exemplary Service Award, 1991 and 2006), Oren A. Oliver Southern Association of Orthodontists (Distinguished Service Award, 2002), and Emory University School of Dentistry (Meritorious Service Award, 2009).
Dr. Rogers has been active in several professional organizations, including the American Dental Association, Georgia Dental Association, American Association of Orthodontists, Southern Association of Orthodontists, Georgia Association of Orthodontists, Medical College of Georgia Orthodontic Alumni Association, Georgia Health Sciences University School of Dentistry Steering Committee, College of Diplomates of the American Board of Orthodontics, Eastern District Dental Society, and Georgia Academy of Dental Practice. He has been published in the Journal of Clinical Orthodontics, Orthodontic Products, and the American Journal of Orthodontics.
When did you first decide to become an orthodontist? Why?
When I was a sophomore in dental school, we had an orthodontic lab and I enjoyed the challenge of bending the wires. In addition, I began to realize how orthodontics can improve a person’s self esteem by improving their appearance. It can make a difference in the job offers they receive, and even their selection of a spouse.
How/why did you choose the school you attended?
I lived in Augusta and selected Emory University (in Atlanta). Its dental school had an excellent reputation. Emory was also the only dental school in Georgia, South Carolina, or Florida at that time. My orthodontic education was at the Georgia Health Sciences University, formerly the Medical College of Georgia.
What surprised you the most about your studies?
I was surprised in dental school by the amount of lab work and dexterity that were involved. Being “good with your hands” is very important for a successful dental career.
If you had it to do all over again, would you still become an orthodontist? (Why or why not? What would you have done instead?)
Yes, if I had it to do all over again, I would still become an orthodontist. Orthodontics has been a rewarding career from all aspects. It has allowed me to influence many lives through improving their smiles.
Has being an orthodontist met your expectations? Why?
Yes, being an orthodontist has more than met my expectations, because it has allowed me to influence many lives by improving their smiles. In orthodontics there are no failures since everyone experiences some improvement. It is very rewarding to see the big smile when the braces are removed, and in many instances the improvement in self esteem.
What do you like most about being an orthodontist?
As an orthodontist, I most enjoy dealing with people and the many variations in orthodontic cases. Some cases involve jaw surgery while others require functional appliances (growth appliances). In addition, I enjoy seeing the “big happy smile” at the end of treatment.
What do you like least about being an orthodontist?
Like any business that depends on appointment keeping, I am sometimes frustrated with the way the schedule can become hectic if patients are running late. On occasion, the schedule is delayed by patients whose appliances are loose and in need of repair. In addition, some patients will not brush their teeth or cooperate in other ways, which can lead to a lot of frustration. Patients can compromise the results of their treatment if they do not keep up with home hygiene, diet recommendations and professional prophylaxis.
See the remainder of the Interview here.

Specialize or Not?

Earlier you might have seen me mention my interest in specialty, particularly Orthodontics or Oral & Maxillofacial Surgery (OMFS). While I find the OMFS procedures very interesting, whilst doing further research on the field, I have decided that the lifestyle that profession affords is definitely not for me.

So I'm back at the drawing board.


I'm still very interested in Orthodontics but since my debut in the Sim lab at the start of my 2nd year I think General Dentistry might be great after all (keep in mind I have not started seeing patients yet). I find myself asking this question a lot lately: Should I specialize or not? The answer to that question is not yet apparent but in the meantime I have decided to continue doing my research on the specialties and perhaps spend some time shadowing or assisting different specialists in hopes of arriving to an answer to my question.

When I figure it out you'll be the first to know.

Interesting Radiograph: Smiling Restoration

So you're a dental assistant or hygienist and you're routinely taking x-rays when after developing you notice this:

courtesy of Dr. Shawneen Gonzalez

Smiling Restoration

What are the odds? Interesting.

Studying for the NBDE I: The beginning

I recently started studying for the NBDE Part 1 in hopes of sitting it some time in the early Spring of 2012. I will try to give a few updates as I go through the process, and some handy dandy tips once it's all over.
As you may know, the NBDE is comprised of the following sections:

  • Human Anatomy and Histology
  • Biochemistry and Physiology
  • Microbiolgy and Pathology
  • Dental Anatomy and Occlusion
I have decided to use the following materials as my guide as well as a few other resources from the stack of text books that have been helpful throughout the past year and a half. 


1. Dental Decks Part 1 2012-2013
2. First Aid for the NBDE Part 1
3. Kaplan NBDE Part 1 Lecture Notes

Plan of attack:
I will be using the materials above simultaneously as I study each section and I will be continuously testing myself on each section completed. 

  1. First thing: Take a practice test to see where I am at this point. This is simply to answer the question: If I were to take the exam today how would I score? 
  2. I will then cover Dental Anatomy and Occlusion because I think that's relatively easy and I should be able to cover it fairly quickly. 
  3. I will then attack Microbiology and Physiology because those are most fresh and hence should also go by fairly quickly. 
  4. Then I'll move on to Anatomy and Histology, then Biochemistry an Physiology where I'll spend the bulk of my time.
  5. These will be done while continuously taking section tests to see my mastery of each section. when I have completed reviewing and/ or studying each section then I will begin taking full tests until test day (which I have yet to set)
This is the plan for now, things may change so stay tuned!

About The NBDE Part I

Now that final exams are over, it's time to go on my well needed Christmas vacation! study for the NBDE Part I (womp).

Different schools have different curricula which affects when we take the NBDE I. However, most dental students are fully ready and equipped to take this exam after their 2nd year and before they enter the clinic. As for me, the aim is to take it in the Spring of the 2nd year.


What is it?: The National Board Dental Examination, as stated by the ADA is given to assist state boards in determining qualifications of dentists who seek licensure to practice dentistry. It is taken to assess the competency of the applicant in the basic sciences and pre-clinical sciences.

How to register for the exam: The process of registering for the NBDE is similar to that of registering for the DAT (assuming you are a dental student and have already been through this process). After going to the NBDE section under the Education & Careers tab on the ADA website (here) you then register for a DENTPIN. After receiving your DENTPIN you can proceed to pay for and register for the exam.

Fees: The fee for the NBDE I is $300. It is non-refundable and includes sending a copy of the score report to the Dean of your Dental School. Any additional score reports required is an additional $25.

Scheduling: After you have registered for the exam, you will have to schedule a date and time to take the exam at a Prometric center via the prometric website (here).

Structure: The NBDE I is an 8hr exam consisting of 400 multiple choice questions based on the basic sciences, with topics including:

  • Human Anatomy and Histology
  • Biochemistry and Physiology
  • Microbiolgy and Pathology
  • Dental Anatomy and Occlusion
and administered in the following order:

Optional Tutorial .............................................................................. 15 mins

Discipline based, multiple choice test items
with 3-5 testlets (approx. 200 items)................................................. 3.5 hrs

Optional Break ................................................................................ 1 hr

Discipline based, multiple choice test items
with 3-5 testlets (approx. 200 items)................................................. 3.5 hrs

Optional Post-exam Survey............................................................... 15 mins

I may not need to plug this, but make sure when taking the NBDE exam that you are ready so that you avoid a bad score Fail (F) and a re-take.

Links:
Download the NBDE I Guide(s) from the ADA - 2011 and 2012
Refer to my previous post on the NBDE's new pass/fail system - Here
NBDE 1 Sample questions from the ADA
NBDE 1 Sample questions from ASDA (purchase)

Happy Studying and Good Luck!!

In The Loupe: Dental Loupes II


Let's talk Specifications and Brands
Go here for In the Loupe: Dental Loupes Part I

The Specs:

Depth of Field - The range of distance that is in focus without moving your head. This deteremines how much you lean in or lean back while wearing your loupe, and still maintaining focus of the entire viewing field. A large depth of field is ergonomically beneficial since you would not need to move your head or back much to work effectively.

Field of View/Field Width - This is the size of the operating site seen through the loupes. Having a wide field of view makes it easier and quicker to adjust from the loupes to the naked eye. It also causes less eye fatigue. * the higher the magnifying power, the smaller the field. * the longer the working distance, the larger the field of view.


Working Distance/Angle- The distance between your eyes and the patients oral cavity when sitting in a normal ergonomic position. This varies by each person's height, body type, or how you sit while with patients. Because the correct working angle allows you to sit in the correct ergonomic position it prevents neck and back pain.


Flip-Up versus TTL type - Each has their specific Pros and Cons and depends on your preference. Refer to Dental Loupes part I for pros and cons.

Resolution - The capability to view small structures and the clarity at which they are seen. This is established by the optical design and the use of precision lenses. 

Magnification - This is the size of the object seen through the loupes (not clarity). 
There is no accepted standard for how magnifying power is defined for surgical loupes. Different definitions give results that differ by as much as 15-percent. Because of this, the quoted magnifying power is really only a rough guide to the actual magnification of a loupe.
John Rogers, PhD, University of Arizona*

Comfort, Weight and Design - these all go hand in hand as the comfort of the loupe depends on the weight and the ergonomic design of the frame. 


The brands:
I have provided the websites for the more popular loupes manufacturers out there. Some of their specifications are slightly different and they all are unique in their own right. Visit the sites for your own comparison, in addition to mine.
  • Zeiss.............................................................................www.zeiss.com
Zeiss carries two types: EyeMag Smart, that has a magnification of 2.5x


and EyeMag Pro that has a magnification of 3.2x an goes up to 5x


Comparison of the two:
Optical Systems EyeMag Smart
Working distance (mm)300350400450550
Working distance (inch)1214161822
Magnification2.5x2.5x2.5x2.5x2.5x
Field of view (mm)67778696115
Optical Systems for EyeMag Pro
Working distance (mm)500500450450400400350350300300
Working distance (inch)20201818161614141212
Magnification3.2x4x3.3x4x3.5x4.3x3.6x4.5x4x5x
Field of view (mm)1159310081866871565644
  • Surgitel........................................................................www.surgitel.com
Surgitel is pretty good in my opinion, it has a wide variety of loupes with magnifications from 2.5x to 8x. The Oakley frames are a popular option but I personally like the Ultralight TTL. It has 2.5x and 3x capability, expanded field sizes and long depth of fields. They are also uniquely stylish!


  • Orascoptic................................................................www.Orascoptic.com
Orascoptic is one of the more popular choices with magnifications of 2.0x to 5.9x. I personally really like orascoptic HiRes2 because they are light weight, has high resolution with a wide and deep field, plus they are stylish and comfortable. 


Sheer Vision loupes are another set of loupes that I think are really good. They come in a variety of types from flip ups to TTLs with a few frame options. They have magnifications from 2.5x to 3.5x. They sport an expanded field of view, exceptional depth of field, sharp ede to edge clarity and are multi coated for anti glare, anti scratch and anti fog resistance. 


Design for Vision loupes has magnifications from 2.5x to 4.5x and comes with designer and sport frames like Nike as well as other types. 

  • Heine................................................................................www.heine.com
Heine loupes has magnifications of 2x to 2.5x. According to Dentistry Today, Heine loupes are unique in their ability to relieve  stress of the practitioner. It features a 3 point articulation system that allows a higher angle of declination than TTLs. The i-view S frame allows for complete adjustment of the angle of declination from a 0 to 45 degree angle.


Loupes are an expensive but worthwhile investment. It is important that you do your research before making a decision and a commitment.  

NOTE: If you contact a representative from any loupe brand, they are usually happy to have you borrow a pair for a couple weeks to try them out (for FREE). Try as many as you want to see which one's best for you.

Resources and Links:
Dental Loupe Reviews
Loupe Direct

In The Loupe: Dental Loupes I

Yes, I am referring to the glasses/goggle looking magnifier of all things small and intraoral. I've been a bit out of the loupe loop when it comes to loupes. There seems to be a lack of information available to help dental students decide on if or what type of loupe to get. Nevertheless, I've decided that I do want loupes, the type or brand of loupe, well, that's another story. There are a lot of specifications to take into consideration and a world of gimmicks to avoid.
So let's talk a little bit about Loupes.


Why Get Them?
Magnification of small intraoral structures, and most importantly ergonomics. One of the major concerns for dentists and dental hygienists is work related injuries. Long hours of awkward sitting, neck posture and eye strain from working in such tiny quarters can really take its toll leading to serious consequences which can be threatening to your career. Because of the magnifying capabilities of loupes, they offer:
  • Reduced eye, neck and back fatigue
  • Better visualization of small structures in the oral cavity
  • Enhanced view of instruments while you work
  • Better work/preps which leads to better grades and increased confidence - and pt satisfaction :)

When To Get Them:
In my opinion, students should get them when they start working in the simulation lab for ergonomic reasons.

Types of Loupes:
Flip-Up - These have the magnification barrels suspended over the glasses by a pivoting arm attached to the nospiece of the glasses.
Pros:
Costs a lot less than TTL
Can easily flip them up when not in use (example: when talking to a patient) 
Easy to add a prescription frame
adjustable angle of inclination
Cons:
Can incorrectly adjust the angle of inclination leading to eye and musculoskeletal problems 
Weigh significantly more than TTLs which can put additional strain on neck and back
They have a narrower field of view because they are mounted farther away from the eyes


Through The lens (TTL) - These have the magnifiation barrels directly on the lens of the glasses.
Pros:
 Weighs less than flip ups
Provides wider field of view
Custom fitted for you personally so no adjustment needed
Cons:
Costs more than flip-ups
If you have a prescription for your lens and your prescription changes,
you will have to send it to the manufacturer to be adjusted ($$)
You have to take loupes off or look up through the lens while talking to patients.


How to Choose the Right Loupe:
Consider the specs:
  • Depth of Field
  • Field of View 
  • Working Distance
  • Flip-Up versus TTL type
  • Resolution
  • Magnification
  • Comfort
  • Weight
  • Design
Consider the brands:
  • Zeiss
  • Surgitel
  • Orascoptic
  • SheerVision
  • Design For Vision
  • Quality Aspirators
  • Heine, etc

Resources and Links:
The ADHA
Loupe Direct

Finals!

It is that time of the semester again.


This post is kind of delayed since Finals started on Monday. Nonetheless, it is still relevant. 

Good luck to all taking Finals!!


Related Posts with Thumbnails